Option 1: Verification Code
This MFA method uses an Authenticator app on your phone to generate one time 6 digit passwords for second factor authentication.
IMPORTANT
This MFS option is supported by all browsers.
Step 1
Log in to your Joomla account then from the Home menu select Edit Profile under Login.
Scroll down until you see the section for Multi-factor Authentication.
Here you will see two options for MFA:
- Verification Code
- Web Authentication.
We recommend configuring both so you have a backup method to login.

Step 2
We will setup the Verification Code first. This method requires an Authentication App installed on your phone. There are browser apps that will work; however you will need to have the browser app to log in to the site on a portable device so they are NOT recommeneded.

Microsoft Authenticator
This is required by the TOH for multi-factor authentication, please use this app if you are employed by the RPPEO (TOH).

Step 3
From the MFA options listed under your profile verify that Verification by email is not enabled, then click add new verification code.

- Enter a Title for this MFA method, I’ve named it Microsoft Authentication code so it will be easier to identify when I login.
- You can make this the default method, this can be changed at any time by editing your profile.
- From the Authenticator app add a new account and select the option to scan a QR code. When the camera appears on the app, scan the QR code on your screen
- Once the app has scanned the QR code and set up the account, select the new entry in your authenticator to see the one time six digit password. Enter the password where shown in the image (left) and click Save.
- You should now see the new Authentication method in your Profile. You can edit and delete this MFA method from here as well.

Step 4
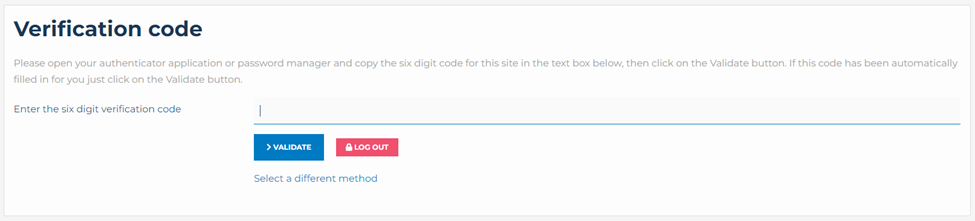
The Verification Code will now be configured and enabled for your account.
When you login you will now be presented with a screen asking for your Verification Code. Enter the code from your phone to complete the login.
Option 2: Web Authentication
This MFA method uses an Authenticator app on your phone to generate one time 6 digit passwords for second factor authentication.
IMPORTANT
This MFS option is supported by Chrome and Edge, it is NOT supported by Firefox.
Step 1
This method uses your phone’s biometrics to login using your fingerprint.
Return to you profile edit page and scroll down to the MFA section.
Click Add a new auth method

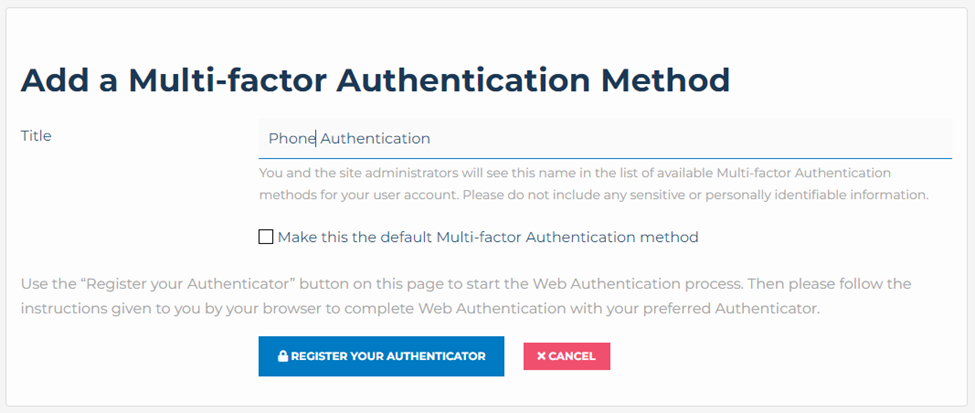
Step 2
On this page, please update the Title to something that will make it easy to identify when needed.
Click Register your Authenticator.
Step 3
You will now be presented with 3 pop ups.
Click OK
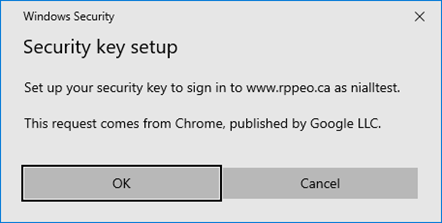
You will see this popup with Chrome and Edge, click okay. This MFA method is not supported by Firefox.
Click Cancel

The browser will ask for a USB based token by default, click cancel.
Select your Phone
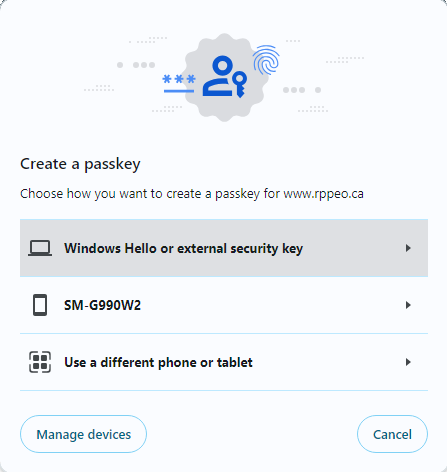
Unlock your phone and you should see the phone connecting, when the site has connected with your phone you will be asked to complete the process using your finger print. Once complete you will be able to select this login method.
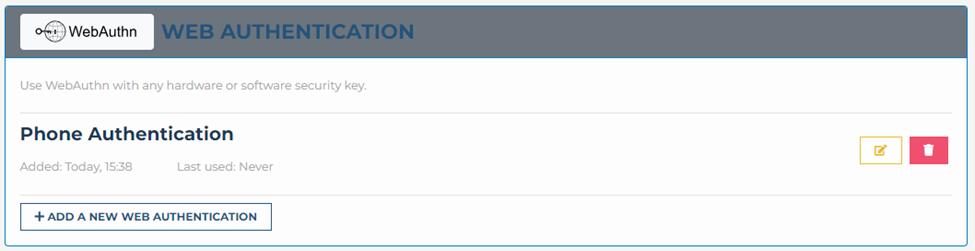
Web Authentication is now configured
Login using Web Authentication

When you login and Web Authentication is your default, you will now see a page asking you to Validate with your Authenticator. If you are using a laptop or PC, open your phone to complete the MFA Authorization by providing your finger print. If you are browsing with your phone you will be asked for your finger print once you click Validate with your authenticator.

Changing the default method for Authorization
To change the default method for logging in you can open Edit Profile, then click on the method you would like to be the default. When it's settings page opens you will see a checkbox to set as default. Check the box and save your profile.
MFA also offers Backup codes as an option should you have issues with the standard MFA options. These codes must be saved somewhere secure.
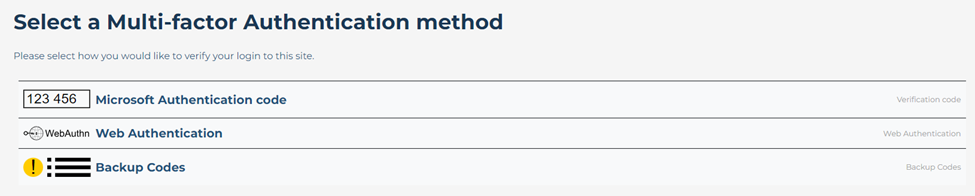
Select MFA Method during logon
You may also select a different method while logging in. Simply click the Select a different Method link on the MFA Login page.

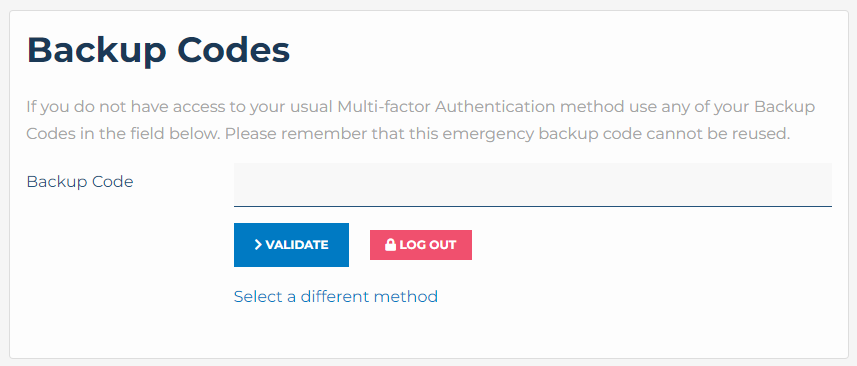
Backup Authorization Codes
The site will generate a set of backup codes that can be stored SECURELY and used should the other multifactor options fail.

There are 10 backup codes initially, you can regenerate the codes as required.
To use a backup code click the link under the Validate button to select a different authentication method, select Backup code.

Enter one of the codes you have printed, this code will be destroyed once used and can not be used again.